

Walk into almost any Australian home built before the 2000s, pull off a light switch plate, and you'll likely find the same thing: a couple of red or brown actives, maybe a loop, and no neutral in sight. That single detail rules out a large slice of the smart switch market and sends plenty of people down a frustrating rabbit hole.
Here's how to work out what you've actually got behind the plate, what a "no-neutral" switch does to make itself work, and the alternatives that often turn out to be cheaper and more reliable.
Why Australian switch boxes usually lack a neutral
Australian domestic lighting has traditionally been wired loop-at-the-light. The active and neutral run to the ceiling rose or batten holder, and only a switch wire drops down the wall to the switch mech. The switch is just interrupting the active — the neutral never comes near it.
A mains-powered smart switch needs a permanent circuit to run its radio, processor and relay. With active and switch-wire only, there's no return path unless the device borrows one.
Two more Australian-specific constraints matter:
- Wall box depth. Many older homes use shallow plaster brackets or a mech clipped straight into a grid plate with very little void behind. Smart mechs are physically deeper than a standard Clipsal rocker, and a bulging plate is a real outcome. [VERIFY depth against the specific product's dimensions]
- Plate compatibility. US-style Decora switches don't fit Australian mounting blocks or the 84mm plate standard, and anything wired into fixed installation should carry RCM marking and comply with AS/NZS 3000 requirements. Grey-import switches bought from overseas sellers may not. [VERIFY certification status of any specific product]
Replacing a hard-wired light switch is electrical work. In every Australian state and territory that means a licensed electrician — it is not a legal DIY job, regardless of what an overseas YouTube video shows. [VERIFY current requirements with your state regulator]
How no-neutral smart switches work — and where they go wrong
A no-neutral switch keeps itself alive by trickling a tiny current through the light fitting even when the light is "off". With old 60W incandescent globes that current was invisible. With a 5W LED downlight, it can be enough to make the lamp glow faintly, flicker, or strobe at night.
The usual fixes:
- A bypass capacitor wired across the active and neutral at the light fitting. It gives the leakage current somewhere to go. Most no-neutral switch brands ship one in the box, and your electrician installs it at the ceiling — which means going into the roof space anyway.
- Minimum load ratings. Many no-neutral switches specify a minimum connected load, often in the 3–20W region depending on the model. A single LED downlight on its own circuit can fall below it. [VERIFY the exact figure on the model you're buying]
- Dimming compatibility. Even where a switch claims trailing-edge dimming, plenty of cheap LED downlights and integrated LED drivers simply won't dim smoothly. If your downlights aren't marked dimmable, no smart switch will fix that.
The honest summary from the specifications: no-neutral switches are a workaround, not a clean solution. They work well in a lot of homes and are maddening in others, and you generally can't tell which one you're in until it's installed.
Check the ceiling first — that's where your neutral lives
This is the tip that saves the most money. If your home is wired loop-at-the-light, there is a neutral — it's sitting at the ceiling rose above the light.
That opens up in-ceiling relay modules: small Wi-Fi or Zigbee devices that mount inside the ceiling cavity or a deep fitting, take a proper active and neutral, and switch the light. Your existing mechanical wall switch stays in place and is re-wired as a low-signal input, so it still works normally — and the family can't tell the difference when the internet drops out.
Why this is often the better retrofit in Australia:
- No leakage current, so no LED glow or flicker.
- No shallow-wall-box problem.
- You keep your existing Clipsal, HPM or Iconic plates and the room looks untouched.
- One module can cover a whole lighting circuit rather than one switch per room.
The catch: ceiling access. If you've got a flat concrete slab, a cathedral ceiling or a heavily insulated roof space, it's a harder job and the labour cost climbs. Ask your electrician for a quote both ways.
Zigbee versus Wi-Fi, and what you'll need to run it
Most no-neutral switches sold here are either Wi-Fi (usually Tuya/Smart Life based) or Zigbee. For lighting specifically, Zigbee tends to be the better technical fit: lower power draw suits the tight energy budget of a no-neutral device, response is fast and local, and a dozen switches won't clog your router's client list.
Zigbee needs a coordinator. If you want something that sits alongside Google Home or Apple Home without a lot of tinkering, a Matter-capable hub is the simpler path.

Zemismart Matter Zigbee Thread Smart Home Hub
If you're already running Home Assistant on a mini PC or Raspberry Pi, a USB coordinator with Zigbee2MQTT or ZHA gives you the widest device support and full local control — useful when a switch brand's cloud has a bad week.

SONOFF Zigbee 3.0 USB Dongle
A practical note either way: mount the coordinator away from your Wi-Fi router and USB 3.0 ports, and use the supplied extension lead. Zigbee sits in the same 2.4GHz band and interference is the most common cause of "my switches are slow".
Renting, or not ready to call an electrician
If you can't modify fixed wiring — which covers most renters — you still have decent options that involve no wiring at all:
- Smart globes in existing fittings. B22 bayonet and E27 Edison screw are both widely available here. The trade-off is that the wall switch must stay on, so label it or fit a childproof switch guard.
- Battery-powered wall remotes stuck to the wall next to (or over) the existing switch. Zigbee remotes from brands like Aqara or Philips Hue send commands directly to smart globes with no wiring involved, and lift off when you move out.
- Smart plugs for lamps, LED strips and floor lighting. This is the fastest win in a rental — a bedside lamp on a schedule does most of what a smart switch does for a fraction of the cost and zero risk to your bond.
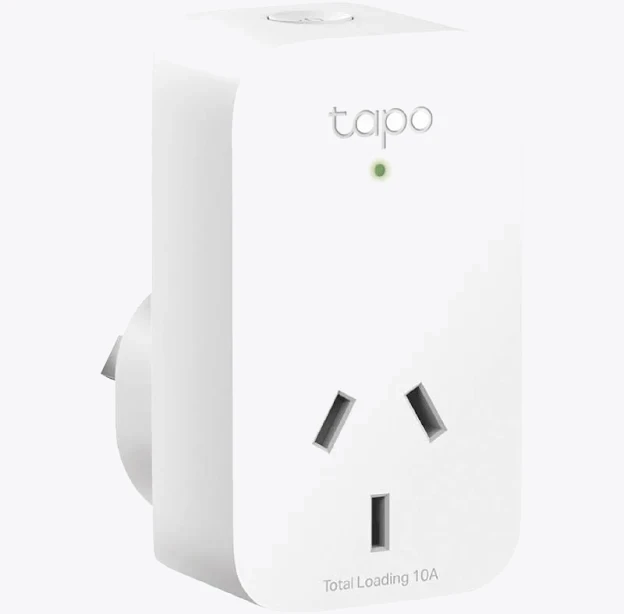
TP-Link Tapo P100 Mini Smart Wi-Fi Socket Plug
One tenancy caution: even reversible changes can be worth a written note to your agent, and anything involving fixed wiring almost certainly needs the owner's consent. Rules differ by state. [VERIFY with your state tenancy authority]
The questions to ask before you buy
Before you spend anything, get these five answers:
- Do I have a neutral at the switch? Have the electrician confirm during the quote — don't guess from photos.
- Is my lighting loop-at-the-light? If yes, seriously price up ceiling modules against no-neutral switches.
- Are my downlights dimmable, and what's the total wattage per circuit? Compare that to the switch's minimum load.
- Is the device RCM-marked and rated for 240V/50Hz Australian installation? [VERIFY per product]
- What happens when the internet is down? Any switch you install should still work as a plain switch.
Budget-wise, expect roughly $40–$120 per smart mech or module, plus an electrician's call-out and time — often $150–$300 for the first hour in metro areas, with additional points cheaper if they're done in the same visit. [VERIFY current pricing]
Done thoughtfully, a no-neutral retrofit works fine. But in a lot of Australian homes, the neutral you need is already sitting three metres above your head — and that's the cheaper, tidier place to put the smarts.


