

If you have ever opened a smart switch box, seen "neutral wire required" on the back of the packet, and quietly put it back in the drawer, you are in very good company. It is probably the single most common reason an Australian smart lighting project stalls before it starts.
The good news: there are at least five workable paths, and only two of them involve rewiring anything.
Why so many Australian switches have no neutral
In a traditional Australian light circuit, the active and neutral both go to the ceiling — to the batten holder, ceiling rose or junction box. From there, a switch loop drops a single pair down the wall: active down, switched active back up. The neutral never leaves the ceiling.
That wiring style was cheap, compliant and completely sensible for a mechanical rocker, which only needs to break one conductor. It becomes a problem when you want the wall plate to contain a Wi‑Fi or Zigbee radio, because that radio needs a continuous small supply — an active and a neutral — even when the light is off.
Roughly speaking, homes wired from the 1990s onward are more likely to have a neutral run to switch positions, and newer builds more likely again [VERIFY — practice varied by state, builder and era; the only reliable answer is an inspection]. Renovated rooms in old houses are a genuine coin toss.
There is a second, less discussed obstacle: depth. Australian wall plates typically mount to a shallow plaster bracket or mounting block rather than a deep gang box, so there may be only 25–35 mm of usable space behind the plate [VERIFY]. Plenty of imported smart mechanisms simply will not fold in behind a standard plate.
First, work out what you actually have
Do not open the switch yourself. In every Australian state and territory, work on fixed wiring — including swapping a light switch — is restricted to a licensed electrician, and DIY work can affect insurance and future sale obligations [VERIFY with your state or territory electrical safety regulator].
What you can do before you call anyone:
- Check the age of the switchboard. Ceramic rewireable fuses and no RCDs usually signal older wiring and a switch-loop layout.
- Look at the ceiling fittings. If your lights are on old batten holders rather than downlights, the original wiring is probably untouched.
- Ask about ceiling access. A crawlable roof space over the room makes running a neutral dramatically cheaper than a slab-ceiling apartment.
- Count the gangs. A four-gang plate controlling hallway, porch, stairs and pantry is where smart switches earn their money — and also where depth problems bite.
When the sparkie is on site for something else, ask them to pull one plate and photograph it. It costs you nothing extra and settles the question.
Option 1: Have a neutral run to the switch
This is the clean answer. You get a full-featured smart switch, no flicker workarounds, and a wiring layout the next owner's electrician will understand instantly.
Cost depends almost entirely on access. A single switch position under an accessible roof space is a modest job; a downstairs switch in a double-storey home with a plasterboard ceiling above it may mean patching and painting. Budget a callout fee plus labour, and expect a real quote to vary widely by location [VERIFY — get at least two quotes].
Worth doing when you are already renovating, re-lighting a room, or replacing a switchboard. Rarely worth it for one switch in isolation.
Option 2: No-neutral smart switches, and why they flicker
No-neutral (sometimes "single-live" or "2-wire") smart switches solve the problem by trickling a tiny current through the light fitting itself to keep their electronics alive. With a 60 W incandescent globe, that current was invisible. With a 5 W LED, it can be enough to make the lamp glow faintly, flash every few seconds, or refuse to turn fully off.
The standard fix is a bypass capacitor wired in parallel at the light fitting — again, a job for a licensed electrician, and it needs somewhere to physically live inside the canopy or ceiling rose.
Things to check before buying:
- Minimum and maximum load ratings for LED, stated in watts, at 240 V.
- Whether a bypass is included in the box or sold separately.
- Whether the mechanism fits an Australian plate and mounting bracket, and whether the plate style matches the rest of your house.
- That the product carries an RCM mark and is legally sold for use on 240 V Australian circuits. Grey imports from overseas marketplaces frequently do not [VERIFY — check the supplier's compliance documentation].
Expect somewhere in the $35–$90 range per gang for reputable no-neutral models sold locally [VERIFY current pricing at Bunnings, Amazon AU, eBay AU and specialist automation retailers].
Option 3: Put the smarts in the ceiling instead
Here is the elegant trick: the neutral you are missing is sitting right there at the light fitting. Compact relay modules (Shelly, Sonoff and similar Zigbee or Wi‑Fi micro-modules) install at the ceiling where active, neutral and switched active all meet.
The existing dumb rocker becomes an input to the module rather than a direct load switch, so the wall plate never changes, the family keeps using the switch they already know, and nothing needs to fit behind a shallow bracket.
Caveats: the module has to physically fit in the canopy, the fitting must not run hot around it, and installation is fixed-wiring work — licensed electrician, no exceptions [VERIFY with your state regulator]. Also confirm the specific module is approved for sale and installation in Australia; the specification sheet, not the marketplace listing, is what matters.
Option 4: Don't touch the wiring at all
For renters, heritage homes and anyone who would rather not book a sparkie, plug-in and bulb-based approaches remain the fastest route:
- Smart globes in existing fittings, with the wall switch left permanently on. Add a battery-powered wireless button stuck over or beside the switch plate so guests do not kill power to the globe.
- Smart plugs for lamps, which cover a surprising share of everyday lighting in living areas and bedrooms.
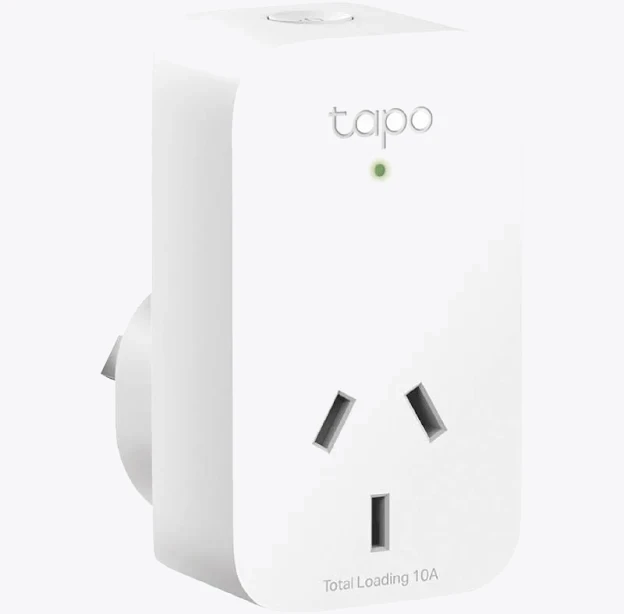
TP-Link Tapo P100 Mini Smart Wi-Fi Socket Plug
On specification, a mini plug like this suits a floor lamp or bedside light comfortably; check the stated maximum load before putting anything with a heating element on it. For a media unit or a desk with several devices, a smart powerboard with individually switched outlets does more work per Type I socket used.
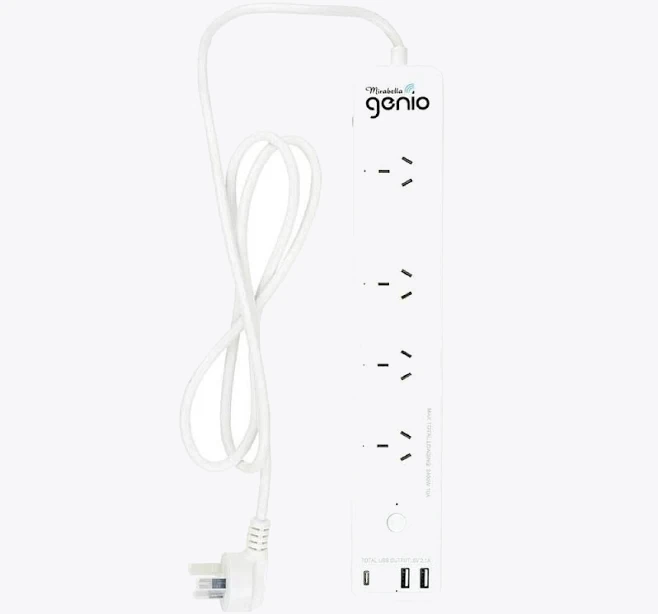
Smart Mirabella Genio Wi-Fi Powerboard
Neither approach gives you the tactile satisfaction of a wall switch, but both are reversible, tenancy-friendly and cost a fraction of rewiring [VERIFY your lease terms before making any permanent changes].
Choose the protocol before you choose the switch
Whatever route you pick, decide early between Wi‑Fi and Zigbee/Thread. Wi‑Fi switches are simplest for one or two positions. Once you are past about six devices, a mesh protocol behaves better — mains-powered switches make excellent Zigbee repeaters, which is a genuine bonus of the in-wall approach.
For a hub-based Zigbee or Thread setup that also speaks Matter to Apple Home, Google Home and Alexa:

Zemismart Matter Zigbee Thread Smart Home Hub
And if you are running Home Assistant on a mini PC or Raspberry Pi, a USB coordinator keeps your lighting local and working during an internet outage — which is the whole point of putting the intelligence in the wall in the first place.

SONOFF Zigbee 3.0 USB Dongle
The practical order of attack
- Try smart globes plus a wireless button in one room. Live with it for a month.
- If you want the real wall-switch experience, get an electrician to inspect one switch position and tell you whether a neutral is present.
- If there is a neutral, buy a standard smart switch and be done.
- If there is not, choose between running a neutral (best long-term), a ceiling relay module (best value where the fitting has room) or a no-neutral switch with a bypass (fastest, most flicker risk).
All fixed-wiring options in that list require a licensed electrician. Nothing about a smart switch changes that.


