

Every winter, the same thing happens in a lot of Australian bathrooms. Hot shower, cold tiles, one small window that nobody opens because it's 8 degrees outside, and by August there's black spotting along the grout and a grey bloom creeping across the ceiling. Wiping it off treats the symptom. Getting the moisture out of the room in the first 20 minutes treats the cause.
A humidity sensor plus an automated exhaust fan is one of the highest-value, lowest-glamour smart home upgrades you can make. Here's how to do it properly.
Start Here: The Practical Version
Put a battery humidity sensor in the bathroom, roughly 1.5m off the floor, away from the shower spray and away from the fan itself. Run the exhaust fan automatically when humidity climbs sharply, and — this is the bit most people skip — keep running it for 15 to 20 minutes after the shower stops. That post-run is where the actual drying happens.
If your fan is hardwired (almost all Australian bathroom fans are), switching it automatically means a licensed electrician installs a smart relay or a smart switch behind the wall plate. That is not a DIY job in Australia. Renters and anyone not ready for electrical work can still get most of the benefit from a sensor plus a plug-in dehumidifier and a phone alert.
Why Australian Bathrooms Grow Mould in Winter
Mould needs moisture, a surface and time. Winter delivers all three at once.
Warm shower air holds a lot of water vapour. When that air touches a cold surface — a single-glazed window, an uninsulated external wall, a ceiling below an unheated roof space — it hits dew point and condenses. Melbourne, Hobart, Canberra and the Adelaide Hills see this badly because overnight surface temperatures drop low while indoor humidity stays high. Even in Brisbane and Perth, a closed-up bathroom in July holds moisture for hours.
The other factor is that a lot of older Australian housing stock has an exhaust fan that vents into the roof cavity rather than outside. That moves the problem rather than solving it, and it can cause insulation and framing issues over time. If you're unsure where yours discharges, that's worth checking before you automate anything — an electrician or handyperson can confirm whether the ducting terminates at an eave or roof vent [VERIFY: depends on your build and applicable AS/NZS ventilation requirements].
What Humidity Level Should You Actually Target?
Indoor relative humidity between roughly 40% and 60% is the commonly cited comfort and health band, with mould risk rising as you sit above 60% for extended periods [VERIFY — guidance varies between health authorities and building sources]. But absolute thresholds make poor automation triggers in a bathroom, for two reasons.
First, ambient humidity swings by season. A Sydney bathroom might sit at 68% on a humid February morning without anyone showering, and 45% in a dry winter westerly. A fixed "run the fan above 65%" rule will run the fan all summer and never trigger in winter.
Second, showers create a spike, and the spike is what you want to catch. The better approach is a rate-of-change or delta trigger: compare the bathroom sensor to a baseline (a hallway sensor, or the bathroom's own reading 15 minutes ago) and run the fan when the difference exceeds around 8 to 12 percentage points. Then stop when the reading returns to within about 3 points of baseline, or after a maximum runtime of 30 to 40 minutes so a stuck reading doesn't run the fan all day.
Choosing a Humidity Sensor for a Wet Room
Bathrooms are hostile to electronics. Look for a sensor with a sensible reporting interval, decent battery life, and a display if you want to eyeball the number while you tune the automation.
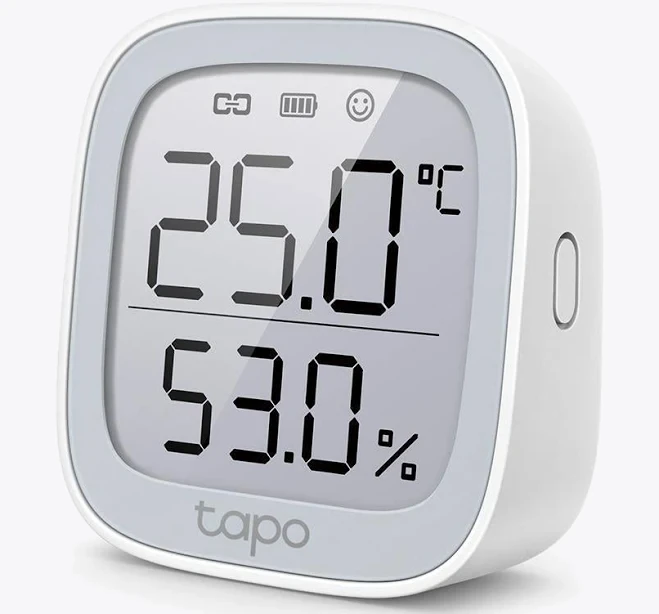
TP-Link Tapo Smart Temperature & Humidity Monitor
Also stocked at: The Good GuysAmazon AU
The Tapo unit is an easy starting point if you're already in the Tapo/TP-Link app, and the E-ink style display makes it genuinely useful as a standalone hygrometer while you work out what your "normal" is. Specification-wise it's designed as an indoor monitor, not a wet-rated device — keep it off the shower wall.
On protocols: Wi-Fi humidity sensors are simple to set up but tend to report less often to save battery, and some are mains-powered, which is awkward in a bathroom. Zigbee sensors typically report faster and last longer on a coin cell, which matters when your trigger depends on catching a rise quickly.
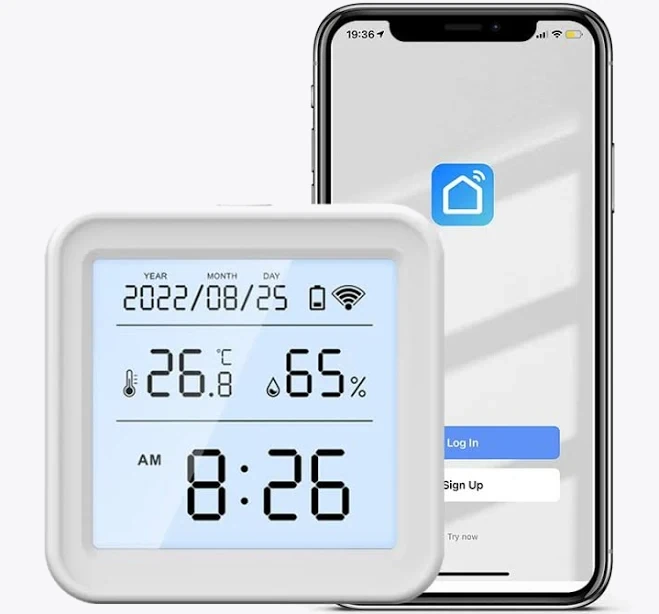
Tuya Wifi Temperature Humidity Sensor Indoor Hygrometer Thermometer Detector Smart Life
Budget Tuya/Smart Life sensors are cheap enough (often well under $30 [VERIFY]) that you can put one in the bathroom and one in the hallway for a baseline comparison. If you run Home Assistant, check before buying whether the model exposes local control or is cloud-only — that determines whether your automation still works when the NBN drops out.
Placement rules that actually matter: mount roughly 1.5m high, at least 1m from the shower screen, not directly under the exhaust grille (it'll read dry air and cut the fan early), and not on the outside of the door. A sensor in the wrong spot produces an automation that feels random.
Switching the Fan: What Needs an Electrician
In Australia, fixed wiring work must be carried out by a licensed electrician, and that includes replacing a bathroom fan switch with a smart switch or installing an in-wall relay behind the existing plate [VERIFY — licensing requirements are set state by state; confirm with your state's electrical regulator]. Bathrooms also have zone restrictions around where switchgear and accessories can be located under AS/NZS 3000 [VERIFY]. Please don't take the plate off and have a go.
What you can do: get a quote for a smart relay module fitted behind the existing fan switch, which keeps the manual switch working while adding automation. Ask the electrician to confirm the fan is rated for extended run times and that the duct discharges outside. If the fan is 20 years old and rattles, replacing it with a higher-flow model at the same time is usually cheaper than two separate call-outs.
Some newer bathroom fans ship with built-in humidity sensing and a run-on timer. Those solve the basic problem without any smart home involvement, but they're a black box — you can't tune the threshold, and you get no history to look at.
Renting, or Not Ready to Rewire?
You can still cut mould risk substantially without touching the wiring.
Run the existing fan manually but set a smart speaker or phone reminder tied to the sensor: when bathroom humidity crosses your threshold, get a notification saying "turn the fan on" — and a second one 20 minutes later saying "you can turn it off". Crude, but it changes behaviour.
Better, pair the sensor with a plug-in dehumidifier on a smart plug and let the humidity reading control the socket.
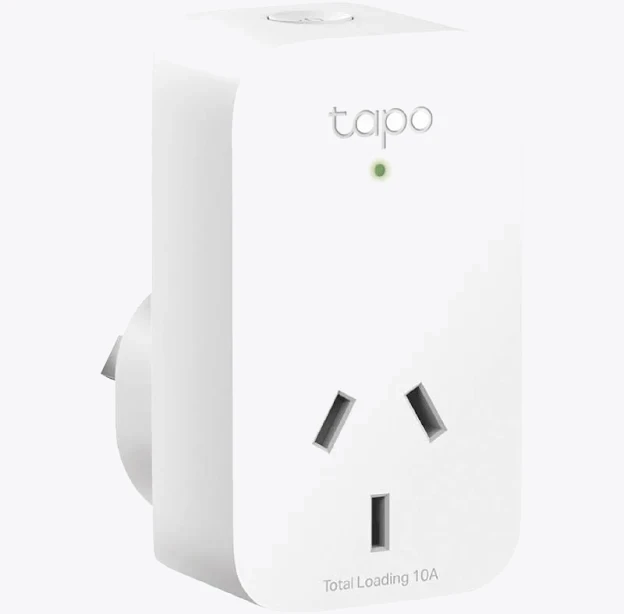
TP-Link Tapo P100 Mini Smart Wi-Fi Socket Plug
A compact 240V smart plug like the Tapo P100 lets you run the dehumidifier only when the bathroom is genuinely damp, rather than leaving it running and paying for it. Check the plug's rated load against the appliance before you commit — dehumidifiers and heaters draw far more than a lamp, and small smart plugs have real limits [VERIFY the specific current rating on the model you buy].
Also worth doing, and free: leave the shower screen open after use, squeegee the walls, leave the bathroom door ajar so the room can equalise, and crack the window on dry winter days even for 10 minutes.
Tuning the Automation Over the First Fortnight
Don't set thresholds on day one. Let the sensor log for a week and look at the graph. You're looking for the resting baseline, the peak during a shower, and how long the room takes to come back down on its own. Then set your delta and your run-on timer from real numbers.
A few refinements worth adding once the basics work:
- Minimum run time. Stops the fan short-cycling on a quick hand wash.
- Maximum run time. A safety net if the sensor battery dies mid-reading.
- Night quietness. Some households drop the run-on to 10 minutes after 10pm, or skip the automation entirely if the fan is loud enough to wake people.
- A manual override. Make sure the wall switch still wins. Nobody wants to argue with their own house at 6am.
If you're running Home Assistant, log the sensor to a long-term database and check it again in September. The satisfying part is watching the winter peaks flatten out — and not finding anything new on the ceiling come spring.


